公開日時:2023.03.30
最終更新日:2023/03/31
スクロールしたら要素を表示させてみよう!

こんにちは!最近スタンディングデスクを購入して、立って仕事をしている、Global Web Designの福田です(笑)
みなさんはWebサイトでスクロールしたら要素がフワッと出てくるのを見たことがあるかと思います。
見た目もカッコ良くなってサイトに動きが出ていろんな場面で使われてますよね!
とはいえ、初心者の方にとって
「どうやって、実装して良いのかわからない・・・」
「プラグインで実装してたけど自分で書けるようになりたい・・・」
など疑問に思うかと思います。
そこで今回は「スクロールした時の要素を表示!」を実装していきます!
目次
スクロール時の要素表示の仕組み
ここから、簡単にスクロール時の要素表示の仕組みをご紹介します!
スクロール時に要素を表示させるには
- JavaScriptで要素の高さを取得
- 要素の高さまでスクロールした時にclass名を要素に追加
- 追加したclass名で要素を表示
となります。
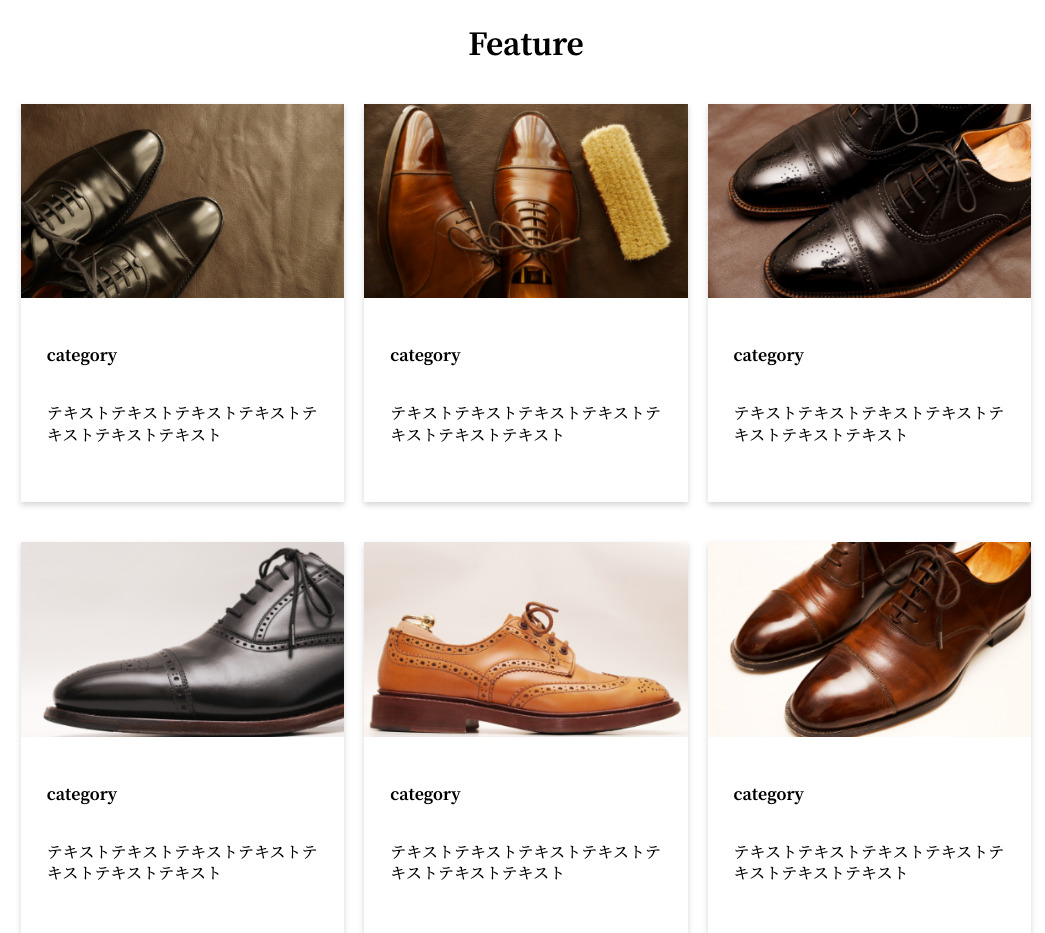
今回はグリッドレイアウトでスクロールした時に要素を表示していきます。
HTMLとCSSを書きます。
<div class="top-sec2" id="feature">
  <div class="container">
    <h2>Feature</h2>
    <div class="item-list">
      <div class="item">
        <picture><img src="https://drive.google.com/uc?export=view&id=1Q871pNjHh9nqpozZz9VYz4hPPLJq-y8-" alt="靴"></picture>
        <div>
          <strong>category</strong>
          <p>テキストテキストテキストテキストテキストテキストテキスト</p>
        </div>
      </div>
      <div class="item">
        <picture><img src="https://drive.google.com/uc?export=view&id=1NbGmMXzXv4FuCn25mPf4oNk89F2AIjEJ" alt="靴"></picture>
        <div>
          <strong>category</strong>
          <p>テキストテキストテキストテキストテキストテキストテキスト</p>
        </div>
      </div>
      <div class="item">
        <picture><img src="https://drive.google.com/uc?export=view&id=1QhEjpAbw5RizXEGBItK6_0MwHvEl3RK_" alt="靴"></picture>
        <div>
          <strong>category</strong>
          <p>テキストテキストテキストテキストテキストテキストテキスト</p>
        </div>
      </div>
      <div class="item">
        <picture><img src="https://drive.google.com/uc?export=view&id=1WY_6kqRUlx1E9rpdlgvrcsPI-psFr1v5" alt="靴"></picture>
        <div>
          <strong>category</strong>
          <p>テキストテキストテキストテキストテキストテキストテキスト</p>
        </div>
      </div>
      <div class="item">
        <picture><img src="https://drive.google.com/uc?export=view&id=1cYRaoDrK21J5qlWwL5OP8virPS9ci0_p" alt="靴"></picture>
        <div>
          <strong>category</strong>
          <p>テキストテキストテキストテキストテキストテキストテキスト</p>
        </div>
      </div>
      <div class="item">
        <picture><img src="https://drive.google.com/uc?export=view&id=1K5ynOoUAsOrSHgiXQL88SBXjBnGaFDh2" alt="靴"></picture>
        <div>
          <strong>category</strong>
          <p>テキストテキストテキストテキストテキストテキストテキスト</p>
        </div>
      </div>
    </div>
  </div>
</div>
html{
font-family: 'Noto Serif JP', serif;
overflow: auto;
}
body{
font-size: 16px;
overflow-x: hidden;
}
p{
line-height: 137.5%;
}
h1, h2, h3{
font-weight: bold;
}
h1, h2{
font-size: 30px;
}
h2{
text-align: center;
margin-bottom: 40px;
}
.container{
max-width: 1140px;
margin: 0 auto;
padding: 0 20px;
}
.item-list{
display: flex;
flex-wrap: wrap;
gap: 40px calc((100% - 96%) / 2);
}
.item{
width: 32%;
height: 451px;
box-shadow: 0 3px 6px rgba(0, 0, 0, .16);
}
.item picture img{
width: 100%;
}
.item div{
padding: 40px 8%;
}
.item div p{
padding-top: 20px;
}HTMLとCSSを書くとこのように表示されます。

このようにシンプルなグリッドレイアウトが出来上がりました。
JavaScriptで要素の高さを取得
ここから要素の高さを取得するためのJavaScriptを書いていきます。
今回はHTML「<div class=”item”>」の高さを取得していきます。
//スクロール時のイベントを追加
window.addEventListener('scroll', function(){

  //すべての.itemを取得
  const item = document.querySelectorAll('.item');

  //querySelectorAll('.item')は配列になるので、for構文で取得
  //配列は0から始まるのでi = 0
  //i < item.lengthで配列の要素よりも数が小さい時 i++(インクリメント)1つずつ増加
  for(let i = 0; i < item.length; i++){

    //.itemのオフセットの高さを取得
    var targetTop = item[i].offsetTop;

    //画面のスクロール量 + 300px > .itemのオフセットの高さを取得
    if(window.scrollY + 300 > targetTop){

      //書くitemにクラスshowを追加
      item[i].classList.add('show');
    }
  }
});
JavaScriptはこのような書き方になります。
ここから1つずつ解説していきます。
「window.addEventListener(‘scroll’, function(){…})」はスクロール時に実行される関数を定義するためのイベントリスナーを追加します。
「const item = document.querySelectorAll(‘.item’)」クラス名が 「item」 である全ての要素を取得して、 item に格納します。
「for(let i = 0; i < item.length; i++) {…}」で取得した全てのアイテムに対して、「{…}」の処理を繰り返します。
JavaScriptでは複数の要素(「document.querySelectorAll(‘.item’)」)がある場合は配列にしてfor文や、foreachなどで取得する必要があります。
「i」はループのカウンタ変数になります。
- item[0]の時は、最初の「.item」を取得
- item[1]の時は、2番目の「.item」を取得
というように「let i = 0; i < item.length; i++」の条件から外れるまで要素を取得します。
「item.length」は「const item = document.querySelectorAll(‘.item’)」配列の要素の数を表しています。
「i」が「item.length」と等しい場合はループ処理が終了します。
「var targetTop = item[i].offsetTop」は「item[i]」の「offsetTop」を取得して代入しています。
これにより、各「.item」のウインドウの上端からの位置を取得することができます。
「if(window.scrollY + 300 > targetTop){…}」はウィンドウのスクロール量に 300px を加えた値が、「targetTop」より大きい時に、という条件分岐になります。
この条件を満たすと「item[i].classList.add(‘show’);」で「item[i]」に「show」というクラスと追加します。
こちらをブラウザで見てると
スクロールした時に要素の位置まで来たらclass「show」がついているのが確認できます。
jQueryで書くとこのようになります。
$(window).on("scroll", function() {

  // すべての .item を取得
  const item = $(".item");

  item.each(function() {

    // .item のオフセットの高さを取得
    const targetTop = $(this).offset().top;

    // 画面のスクロール量 + 300px > .item のオフセットの高さを取得
    if ($(window).scrollTop() + 300 > targetTop) {

      // .item にクラス .show を追加
      $(this).addClass("show");
    }
  });
});
追加したclass名で要素を表示
最後に追加したclass名で要素を表示させます。
CSSに「show」がついた時のCSSを書きます。
html{
  font-family: 'Noto Serif JP', serif;
  overflow: auto;
}
body{
  font-size: 16px;
  overflow-x: hidden;
}
p{
  line-height: 137.5%;
}
h1, h2, h3{
  font-weight: bold;
}
h1, h2{
  font-size: 30px;
}
h2{
  text-align: center;
  margin-bottom: 40px;
}
.container{
  max-width: 1140px;
  margin: 0 auto;
  padding: 0 20px;
}
.item-list{
  display: flex;
  flex-wrap: wrap;
  gap: 40px calc((100% - 96%) / 2);
}
.item{
  width: 32%;
  height: 451px;
  box-shadow: 0 3px 6px rgba(0, 0, 0, .16);
 /* 追記 */
 transform: translateY(20px);
  opacity: 0;
  transition: .5s;
}
/* 追記 */
.item.show{
  transform: translateY(0);
  opacity: 1;
}
.item picture img{
  width: 100%;
}
.item div{
  padding: 40px 8%;
}
.item div p{
  padding-top: 20px;
}
「transform: translateY(20px);」で最初下に20px下げておいて、表示される時に下から出るように設定します。
「opacity: 0;」で透明にして見えなくします。
「transition: .5s;」で「show」のクラスがつく前と、ついた後の変形する時間を0.5秒にしておきます。
「.item.show{…}」で「transform: translateY(0);」で元の要素の位置に、「opacity: 1;」で表示させれば完成となります。
個別に要素が表示するタイミングを変えるのであれば、CSSアニメーションを使用するのが良いと思います!
完成はこちらになります!
See the Pen スクロールインビュー by Fukuda Yuzuru (@fukuda-yuzuru) on CodePen.
まとめ
いかがでしたでしょうか?
今回は「スクロールした時の要素を表示!」を実装してました!
複数の要素があるときに、JavaScriptの「for」や「foreach」などを使ってまとめて処理ができます。
「for」や「foreach」などはよく使いますし、便利ですので使い方を覚えておくと良いでしょう!
アニメーションの部分はCSSで行なってますので、好きなように書いてみて、さまざまな動きにしてみるのも楽しいかと思います!


